Pixels with half blocks
Goal
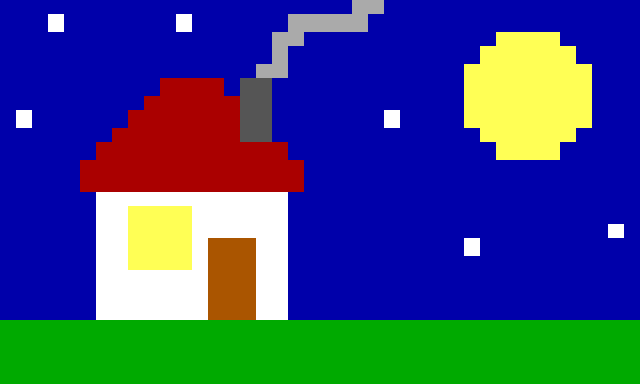
Draw in pixels instead of glyphs. You'll make this night scene, 40 columns by 12 rows, with Blockwright's half-block tools: the brush, line, rectangle, ellipse, fill and eyedropper. Shown at 2×:
The idea
A cell is twice as tall as it is wide. The upper half block, ▀, fills its top half, so a cell can show two square pixels, one over the other: the top in the foreground colour and the bottom in the background. That makes the canvas a grid of pixels, as wide as it has columns and twice as tall as it has rows. Pixel rows count down from 0 at the top, two to a cell row: cell row 3 holds pixel rows 6 and 7. In this tutorial a pixel's position is its column and its pixel row, so 11, 8 is the top half of the cell at column 11, row 4.
The half-block tools draw in pixels. You say what colour each pixel is, and Blockwright works out each cell's glyph and colours:
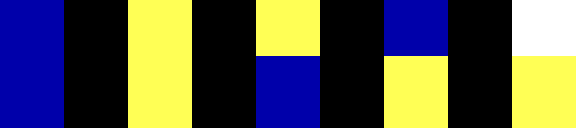
- Both pixels one dark colour (the first eight): a space on that background.
- Both pixels one bright colour (the second eight):
█, the full block, in that colour. - Two colours:
▀, the top colour as the foreground and the bottom as the background. When only the bottom is bright, Blockwright uses▄instead, the lower half block, so the bright colour is the foreground and the background stays dark. - Two bright colours: one of them has to be the background, so the cell needs iCE colours (tutorial 01), which give backgrounds all 16. The last cell above is
▀in white on yellow.
With iCE colours off, a cell can't show two bright colours. Blockwright keeps the half that is there and paints the new half in its dark version: yellow comes out brown, white grey, light red red. Here are the same five cells drawn with iCE colours off:

Pixels go in cells that are pixels: spaces, █, ▀ and ▄. A pixel drawn on any other cell, a letter or a shade block, turns that cell into pixels: its glyph is gone, and its other half takes the background colour the cell had.
4-connected and 8-connected
A line of pixels is 4-connected when each pixel touches the next along a side, and 8-connected when it may touch the next only at a corner. On a slant, an 8-connected line takes one pixel a step; a 4-connected one adds the corner pixel at every step, so it reads as one stroke. The Line tool always draws 4-connected. The Half-Block Brush draws 4-connected while Pencil 4-connected is ticked in its options, which it is to start with.
Do it
You'll draw the scene in order, back to front. The positions are where the pictures put things; you don't have to hit them exactly. Zoom in (Ctrl+=) so you can count cells. Every drawing tool here draws in the pen's foreground with the left button and its background with the right. Pick colours in the Palette dock: left-click a swatch for the foreground.
The status bar starts with the position of the cell cursor, column then cell row, but the drawing tools don't move it, and it doesn't follow the pointer. To read a position, take Keyboard (Tools > Keyboard, Ctrl+K) and click the cell, then go back to your tool. The pixel row is twice the cell row, plus 1 for the bottom half: the bottom half of cell row 4 is pixel row 9.
-
A new canvas. On the start screen, as in tutorial 01, set Width to 40 and Height to 12, leave iCE colours ticked, and press New. The canvas is 40 × 24 pixels, all black.
-
The sky. Take Fill (Tools > Fill, Ctrl+J) and left-click blue, the second swatch. Click anywhere on the canvas. A fill takes the pixel you click and every pixel of the same colour joined to it along a side, so it takes the whole black canvas.

-
The ground. Take the Rectangle (Tools > Rectangle, Ctrl+U) and tick Filled in the Tool Options dock (or Tools > Filled Shapes, Ctrl+Shift+F; without it, rectangles and ellipses are outlines). Left-click green, the third swatch. Drag from
0, 20to the bottom-right corner,39, 23. A rectangle runs from the pixel you press on to the one you let go on, both included.
The ground's top edge is pixel row 20, the top of a cell, so its cells are whole: spaces on green. An edge one pixel lower would be a half block in every cell along it, which costs more bytes on IRC (tutorial 11).
-
The moon. Take the Ellipse (Tools > Ellipse, Ctrl+Shift+O) and left-click yellow, the fifteenth swatch. Drag from
29, 2to36, 9. The ellipse is drawn inside the box you drag, here 8 pixels each way. Where its edge cuts a cell, the cell is▀or▄, yellow on blue.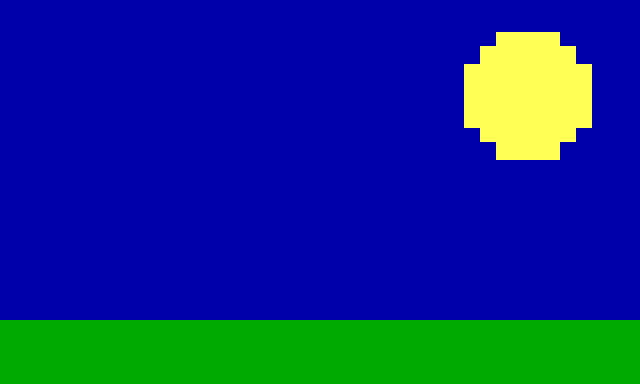
-
The walls. Back to the Rectangle, Filled still ticked. Left-click white, the last swatch, and drag from
6, 12to17, 19.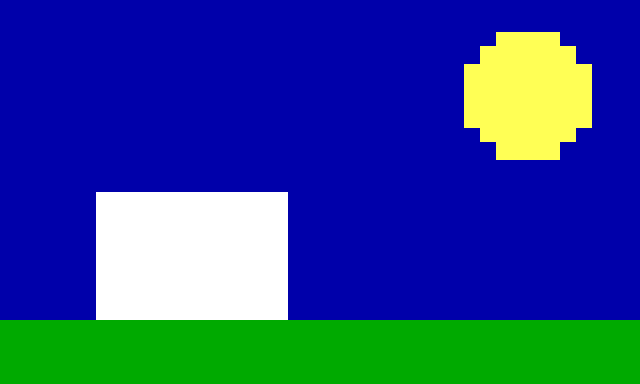
-
The roof's outline. Take the Line (Tools > Line, Ctrl+L) and left-click red, the fifth swatch. Draw three lines:
5, 11to11, 5, then12, 5to18, 11, then5, 11to18, 11along the eaves. Each slant is a stair with a pixel in every corner, so the outline has no gaps.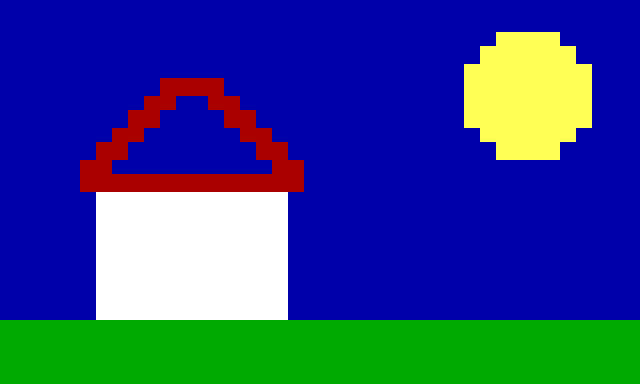
-
Fill the roof. Take Fill again, still red, and click inside the triangle, at
11, 8. The fill stops at the red lines. If the whole sky turns red, a line left a gap: undo (Ctrl+Z), close it, and fill again.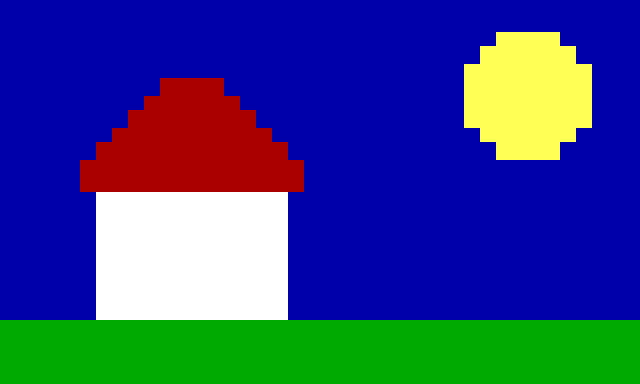
-
The window and the door. Take the Eyedropper (Tools > Eyedropper, Ctrl+I) and left-click the moon: its yellow becomes the foreground. On a cell of pixels the eyedropper picks the colour of the half under the pointer. Take the Rectangle and drag from
8, 13to11, 16for the window. Then left-click brown, the seventh swatch, and drag from13, 15to15, 19for the door.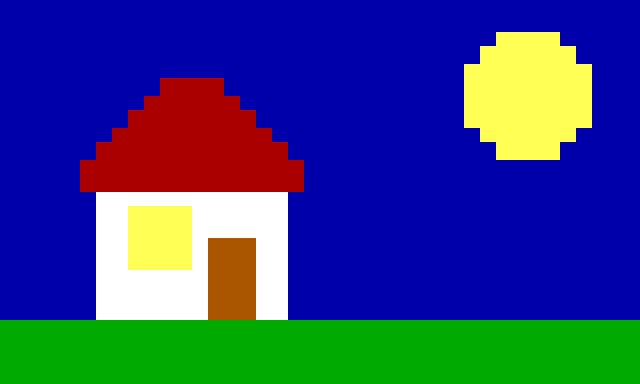
The window starts and ends halfway down a cell. Its top row of cells is white over yellow and its bottom row yellow over white: two bright colours in a cell, so those eight cells are only possible with iCE colours.
-
The chimney and its smoke. With the Rectangle, left-click dark grey, the ninth swatch, and drag from
15, 5to16, 8. Then take the Half-Block Brush (Tools > Half-Block Brush, Ctrl+B) and check that Pencil 4-connected is ticked in Tool Options. Left-click grey, the eighth swatch. The smoke goes up from just above the chimney, then drifts right, through16, 4,17, 2,19, 1,21, 1and23, 0. Draw it as four short drags, each from one of those points to the next:16, 4to17, 2,17, 2to19, 1,19, 1to21, 1, and21, 1to23, 0. The brush paints where the pointer goes and joins the points of a drag into one line, so a quick drag leaves no gaps, and a short straight one is easy to keep on its path.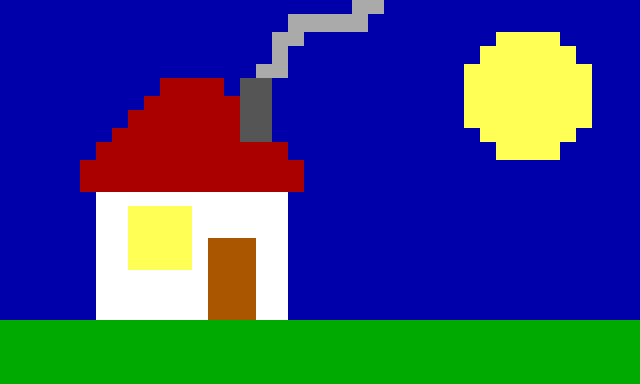
-
The stars. Still with the brush, left-click white and click once for each star, at
3, 1,11, 1,1, 7,24, 7,29, 15and38, 14. A click paints one pixel. Small stars are single pixels: a star of a few pixels reads as a cross or a blob. Keep each one four or more pixels off every shape, the house, the smoke and the moon, or it reads as a stray pixel of that shape.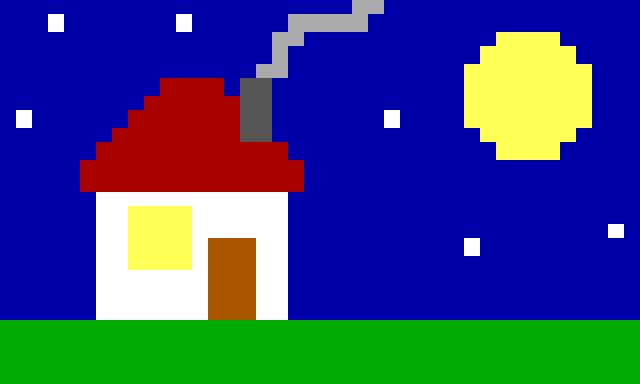
-
Turn iCE colours off. Untick View > iCE Colours. The cells don't change, but each bright background now shows in its dark colour, as it does in a viewer without iCE colours (which also makes it blink). The window's top row turns white over brown and its bottom row yellow over grey:
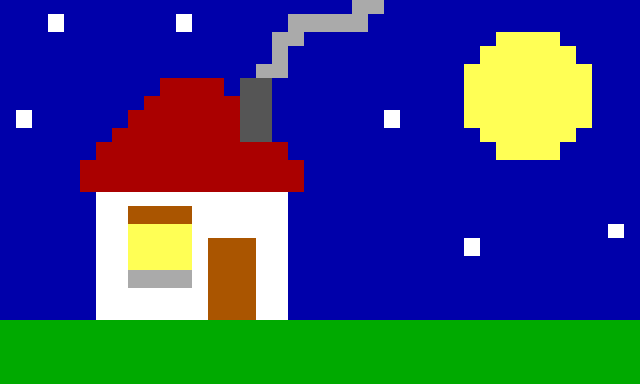
Tick View > iCE Colours again (or undo, Ctrl+Z). Blockwright saves the setting in the file.
Check it
No dotted diagonals. An 8-connected line of 1-pixel steps touches only at its corners. Zoomed in it looks like a line; at 1× it falls apart into dashes. The same slope 8-connected (left) and 4-connected (right), at 2× and at 1×:
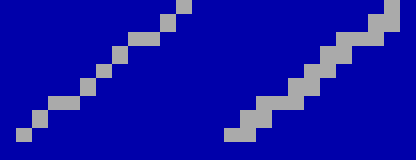
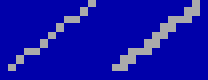
Keep Pencil 4-connected ticked for 1-pixel lines: smoke, cables, straps, outlines.
No fallback specks. A pixel drawn on a shade block turns the cell into pixels, and its other half takes the shade's background. Below, a yellow line 1 pixel deep crosses blue-and-grey ▒ cells. On the left it leaves a solid blue stripe above it, a half cell of fallback colour in every cell it cut. On the right the line is 2 pixels deep on a whole cell row, so it sets both halves of each cell and leaves no fallback:
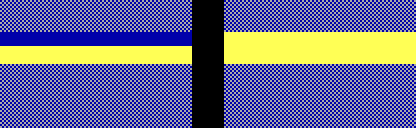
Over shading, draw on whole cells, or set both pixels of every cell you touch.
Pixels erase letters. A letter is a cell that isn't pixels, so a pixel drawn on it turns it into pixels. The moon drawn after the word MOON took the N:
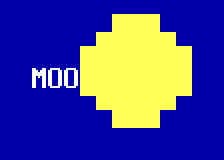
Draw the picture first and type the words last, or keep shapes off the rows the words are on.
Small circles aren't round. The Ellipse tool's smallest circles are squares and crosses. These are filled ellipses from 3 to 8 pixels across:
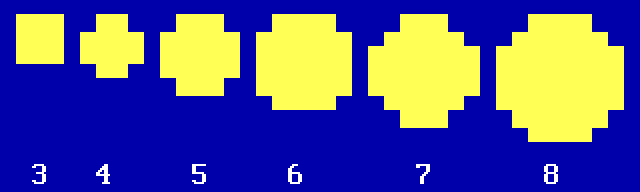
Look at a small round thing at 1×, and if it reads as a square, draw it pixel by pixel with the Half-Block Brush.
Stars stand clear. A star close to a shape reads as part of it, a chip or a stray pixel, not a star. On the left the star is two pixels from the moon's rim, with one pixel of sky between; on the right it is five pixels off and reads as a star:
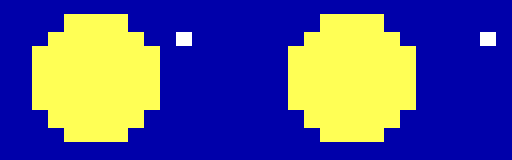
Keep every star four or more pixels off every shape.
Close an outline before you fill it. A fill runs out through a gap of one pixel. Here the roof's right side stops two pixels short of the eaves, and the fill went out through the gap and took the whole sky:
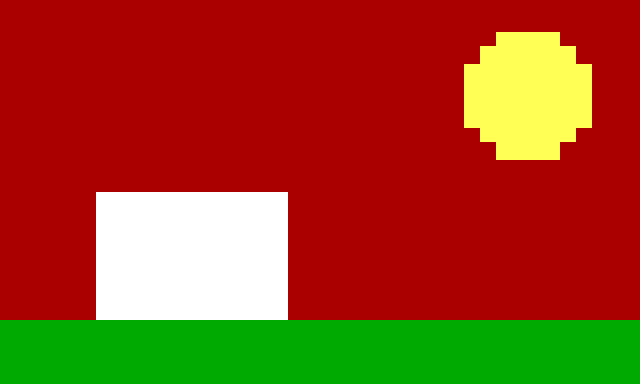
Undo, close the gap, and fill again.
Try it
Download try.ans and open it (File > Open, Ctrl+O):
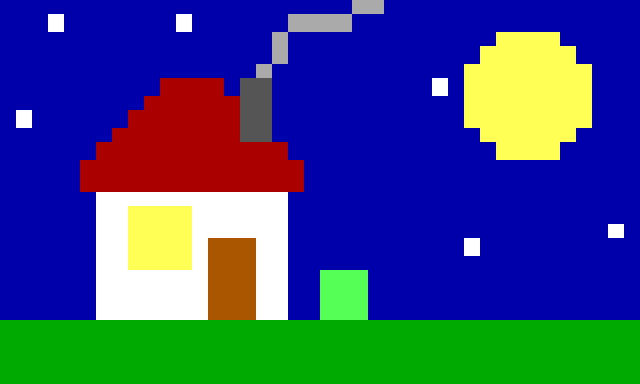
It is the night scene with three faults from Check it.
- Find the three faults, and fix each one in Blockwright.
- Which cells need iCE colours? Use the Eyedropper on the top and the bottom half of the cells you suspect: two bright colours in one cell need them.
Answers
-
- The smoke is 8-connected, so it breaks into dashes at 1×. Draw it again straight over the top: take the Half-Block Brush in grey with Pencil 4-connected ticked and make step 9's four drags, from
16, 4through17, 2,19, 1and21, 1to23, 0. Every pixel of the dashed smoke lies on that 4-connected path, so the drags only add the missing corners, and the smoke comes out as step 9 drew it, with nothing to erase first. - The star beside the moon, at
27, 5, is two pixels from the moon's rim, so it reads as a chip of the moon. With the brush, left-click blue and click it out, then left-click white and click a new star in open sky, four or more pixels off every shape:24, 7is where step 10 puts it. - The bush by the house is an ellipse 3 pixels across, so it came out a square. Draw it again by hand with the brush, or draw a bigger ellipse: from 7 pixels across, the tool's ellipses come out round.
- The smoke is 8-connected, so it breaks into dashes at 1×. Draw it again straight over the top: take the Half-Block Brush in grey with Pencil 4-connected ticked and make step 9's four drags, from
- The eight cells across the window's top and bottom rows, columns 8 to 11 of cell rows 6 and 8. The top row is white over yellow and the bottom row yellow over white. No other cell holds two bright colours.
Tutorial 04, Shading: the ladder, goes on from here: the shade blocks ░▒▓ as rungs between two colours, and the shade brushes.
Describes Blockwright 0.1.0 (c44974c).